
- All
- Product Name
- Product Keyword
- Product Model
- Product Summary
- Product Description
- Multi Field Search
Views: 0 Author: Site Editor Publish Time: 2026-09-09 Origin: Site


Is unexpected truck downtime bleeding your maintenance budget dry? A failing heavy-duty transmission can ground a commercial rig instantly. Suddenly, a profitable long-haul route turns into a logistical nightmare. When diagnosing the auxiliary section of an Eaton transmission, the central drive gear is frequently the underlying culprit.
Ordering incorrect replacement specifications—specifically mismatching the tooth count or internal dimensions—will inevitably cause catastrophic gearbox failure. Such errors waste valuable capital and extend downtime unnecessarily. In this comprehensive engineering guide, you will learn the exact methods to accurately measure internal components, decode nomenclature tags, and source the correct parts to get your fleet back on the road safely.
Exact Matching is Non-Negotiable: Installing a component with an incorrect tooth profile or internal pitch will rapidly destroy the surrounding planetary assembly.
Identify Before You Buy: Always consult the transmission nomenclature tag to verify your exact model before ordering replacement components.
Verify the Specs: Standard configurations, like the 31-tooth/24-spline layout, are common but not universal. Internal groove counts vary significantly across generations.
Holistic Replacement: When undertaking a rebuild, inspecting all mating assemblies for collateral wear is mandatory to ensure long-term drivetrain reliability.
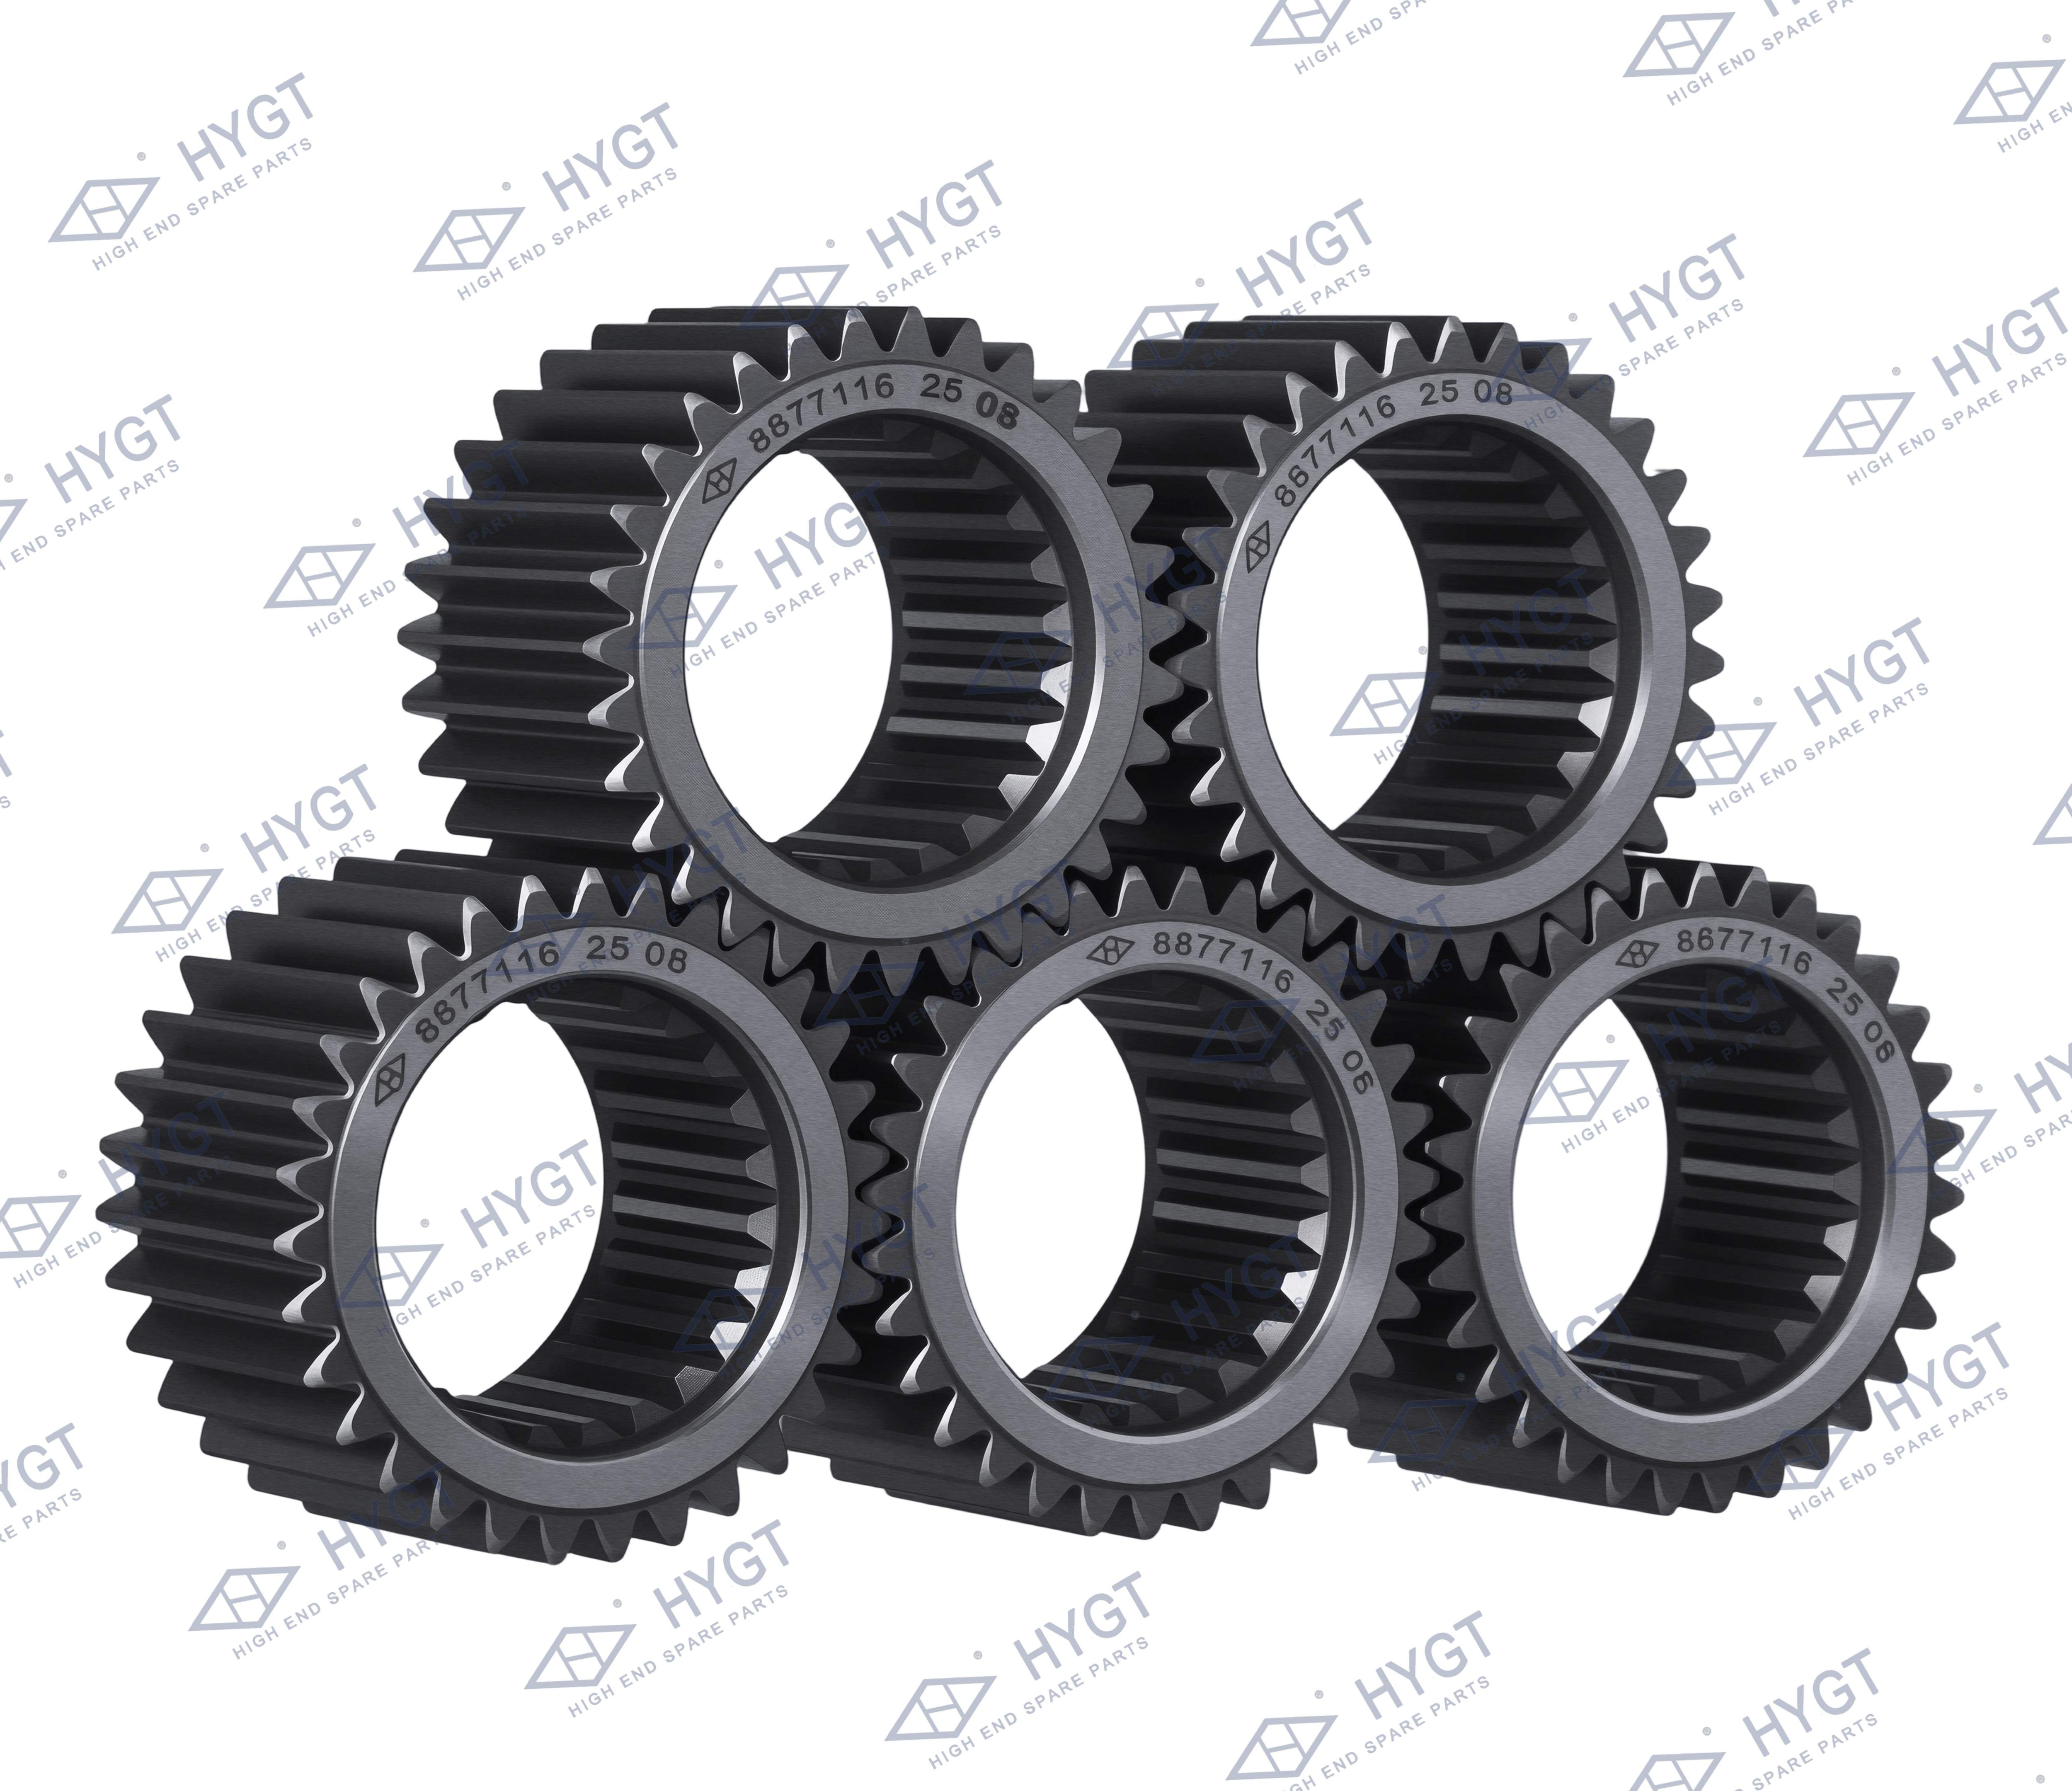
To execute a successful mechanical repair, you must first understand how this specific component operates under extreme stress. Heavy-duty commercial transmissions are divided into a main section and an auxiliary section. Positioned dead center within the auxiliary housing, this gear plays a pivotal role in range reduction and torque multiplication.
Imagine hauling 80,000 pounds up a steep, 6-percent grade from a dead stop. The mechanical advantage required for this feat comes directly from the planetary gear system. This central gear meshes directly with multiple planetary pinions revolving around it. When the driver shifts into a low range, the sliding clutch engages. This action forces the pinions to walk around the center, significantly reducing the output shaft speed while simultaneously multiplying the torque sent to the drive axles.
When this crucial element begins to degrade, the symptoms are rarely subtle. Recognizing these warning signs early prevents complete destruction of the auxiliary section. A distinct, aggressive grinding or whining noise when operating in low range usually indicates improper meshing. Furthermore, an inability to shift smoothly between high and low ranges often points to damaged internal ridges or binding teeth. If you spot jagged metal chunks or heavy brass particles in the fluid during a routine drain, you are looking at definitive confirmation of severe internal wear.
In the current heavy-duty logistics sector, there is a distinct industry shift toward predictive maintenance and extended lifecycle management. Fleet managers are aggressively moving away from outdated "run-to-failure" models. Instead, they are opting for precise, data-driven component replacements before catastrophic failure occurs.
Furthermore, global supply chain volatility continues to impact heavy-duty part availability. Because OEM lead times can sometimes stretch for weeks, high-quality, precision-machined aftermarket alternatives have surged in popularity. However, this shift places the burden of exact specification matching squarely on the shoulders of mechanics and fleet operators. Securing the exact specifications on the first attempt has never been more critical. Ordering an incompatible component not only wastes maintenance budgets but can sideline a profitable truck while waiting for the correct replacement to arrive.
Gear ratios in heavy-duty drivetrains are fixed, precise mathematical equations. The interaction between the center gear and the surrounding pinions relies on absolute, perfect engagement. Even a minute, single-tooth difference alters the intended ratio, causing the hardened metal surfaces to violently bind against each other. This binding generates extreme friction, excessive heat, and ultimately, instantaneous mechanical failure.
Among various layouts, the 31-tooth configuration is one of the most frequently encountered setups in the field. For instance, a highly sought-after specification features 31 outer teeth paired with 24 internal splines, frequently cross-referenced with OEM part number 8877116. This specific 31 tooth sun gear serves as standard fitment in numerous popular 13-speed and 18-speed models, such as the RTLO-18918B.
Because these specific transmissions dominate long-haul and heavy-haul applications, aftermarket demand is consistently high. However, assuming that any gear with a 31-tooth outer count will seamlessly fit your specific drivetrain is a dangerous and costly misconception. You must verify the internal dimensions.
Counting gear teeth might seem like a straightforward task. Yet, human error is incredibly common in a fast-paced, poorly lit shop environment. Mechanics must adopt a foolproof verification method. First, wipe away all residual heavy gear oil and sludge using an industrial solvent so the metal profile is clearly visible. Next, use a bright-colored paint pen to mark the valley between two specific teeth—this becomes your absolute starting point. Count each tooth moving clockwise. Finally, once you reach the marked starting point, count the sequence a second time in the counter-clockwise direction. Both totals must align perfectly before any order is placed.
Beyond the outer teeth, the internal layout demands equal scrutiny. While the exterior meshes with the planetary system, the internal center features a transmission spline. These precision-machined ridges and grooves mate directly with the corresponding drive shaft. They transmit immense rotational torque while allowing the gear to slide horizontally during complex range shifts.
The initial step in matching these specifications is establishing the correct count. It is crucial to remember that the outer tooth count and the inner groove count are two entirely separate metrics. A component might feature 31 outer teeth but could house a 24-spline internal configuration, or a completely different variant altogether. Utilize the same paint-pen marking methodology described previously to guarantee absolute accuracy.
Counting the ridges alone is insufficient; technicians must also measure their precise physical dimensions. Using a calibrated digital caliper, measure the major diameter (the maximum distance across the deepest internal grooves) and the minor diameter (the minimum distance across the highest internal peaks).
Specifically, it is vital to identify the profile type. Most modern commercial drivetrains utilize involute profiles, characterized by gently curved sides that reduce stress concentrations and provide a natural self-centering effect under load. Forcing an incompatible gear onto a shaft will result in immediate, irreversible galling.
Specification Metric | Exact OEM-Grade Match | Mismatched / Substandard Part |
|---|---|---|
Tooth Count | Perfect mathematical ratio, smooth planetary engagement. | Violent binding, extreme heat, immediate shattering. |
Internal Splines (e.g., 24-spline) | Even torque distribution along the main shaft. | Micro-play causing spline stripping and shaft scoring. |
Metallurgy | Carburized steel, hard outer shell, ductile core. | Brittle alloy, susceptible to premature pitting under load. |
Consequently, guessing these critical measurements based on the truck's year, make, or model is a massive gamble. Commercial vehicles frequently undergo drivetrain swaps or comprehensive rebuilds over their lifespan. The only irrefutable source of truth for ordering a replacement Fuller sun gear is the original nomenclature tag.
This identification tag is typically a small, stamped aluminum or steel plate securely riveted directly to the main housing. On the vast majority of Eaton models, you will find this tag positioned on the passenger side of the main case, usually toward the lower half. If years of road grime have obscured it, gently use a wire brush and brake cleaner to reveal the stamped alphanumeric sequence.
Understanding this model number ensures you source the exact component engineered for your engine's torque rating. Let's break down a standard designation, such as RTLO-18918B:
R: Roadranger (The brand designation).
T: Twin Countershaft architecture.
L: Low Inertia internal design.
O: Overdrive gearing.
18: Torque capacity multiplier (18 x 100 = 1,800 lb-ft nominal rating).
9: Design generation or evolution level.
18: Total number of forward speeds.
B: Specific gear ratio set.
Armed with the correct replacement component, the physical repair process can commence. Replacing this central unit is an advanced mechanical procedure requiring strict adherence to industry-standard protocols.
Safety and cleanliness form the foundation of any successful drivetrain repair. Park the commercial vehicle on a flat, level concrete surface, chock the drive wheels securely, and completely drain the air system to prevent accidental pneumatic engagement. Drain the fluid into a clean catch pan, inspecting it closely for metallic debris. Gather your specialized tools, including heavy-duty snap ring pliers, a dedicated transmission jack, and a calibrated torque wrench.
To access the internal components, the auxiliary section must be carefully separated from the main case. Begin by disconnecting and clearly labeling all pneumatic lines routing to the high and low-range cylinders. Remove the retaining bolts, leaving two loosely threaded on opposite sides to prevent the heavy housing from dropping abruptly. Using the transmission jack for support, gently pry the housing backward. Never force it or use hardened steel pry bars on the mating surfaces, as this will score the aluminum and cause permanent oil leaks.
Once the auxiliary housing is safely resting on a workbench, the rear of the main shaft is fully exposed. Locate the heavy-duty snap ring securing the assembly. Using specialized pliers, expand and extract the retaining ring. Discard it immediately, because snap rings lose their structural tension once stretched. Carefully slide the damaged gear off the shaft. If it has seized due to severe thermal events, a specialized mechanical puller will be required.
Thoroughly clean the main shaft, inspecting it for micro-cracks or twisted splines. Apply a generous coating of approved assembly lubricant to the shaft. Align the internal grooves of the new gear and slide it into position. It should seat smoothly without requiring any blunt force. Install a brand-new snap ring, ensuring it "clicks" fully into its designated groove. Finally, reattach the auxiliary housing using a fresh gasket, torquing all bolts to the manufacturer's exact sequence to prevent housing distortion.
When sourcing replacement Eaton gearbox parts, owner-operators face a critical decision between Genuine OEM components and aftermarket alternatives. This choice directly influences both upfront capital expenditure and long-term fleet reliability.
The central gear operates in a remarkably hostile environment, subjected to massive, continuous torque loads. Premium components are forged from specific grades of heat-treated alloy steel. The manufacturing process involves carburizing, which creates an exceptionally hard, wear-resistant outer shell while maintaining a slightly softer, ductile core capable of absorbing shock loads without shattering. In contrast, unverified, low-tier aftermarket knock-offs often utilize inferior steel blends. These substandard gears are highly susceptible to premature pitting, tooth shearing, and sudden failure on steep grades.
Purchasing from a reputable, dedicated heavy-duty supplier guarantees exact dimensional fitment. Premium suppliers possess the technical databases necessary to cross-reference your nomenclature tag, ensuring the new gear perfectly matches the original equipment.
Even seasoned diesel technicians can occasionally make critical errors during the ordering and installation phases. Avoiding these frequent pitfalls will save significant time and prevent devastating secondary failures.
A widespread misconception is that all transmissions within a specific speed category are internally identical. Assuming that every 18-speed gearbox utilizes the exact same central gear is a costly mistake. As designs evolve from generation to generation, manufacturers subtly update pitches, groove counts, and bearing tolerances. Always rely exclusively on the specific identification tag.
Gears wear together over hundreds of thousands of miles as a mated set. If the central gear has failed, it is virtually guaranteed that the surrounding planetary gearbox parts have also sustained micro-fractures, pitting, or abnormal wear patterns. Replacing just one piece while leaving damaged pinions in the assembly will rapidly destroy the new component. A comprehensive inspection of the entire planetary system is mandatory.
Failing to properly lubricate the internal grooves and metal surfaces during reassembly causes devastating "dry starts." The initial friction generated before the heavy gear oil fully circulates can cause immediate, microscopic galling on the fresh metal. Always utilize a generous application of specialized assembly grease during the rebuild.
Successfully replacing this critical drivetrain component requires absolute precision and methodical care. Matching the exact tooth count and the internal dimensional specifications is the only proven method to ensure a durable, long-lasting repair and prevent secondary mechanical failures.
Taking the extra ten minutes to clean the tag, count the teeth twice, and measure the internal diameters accurately will save thousands of dollars in wasted parts and extended downtime. Do not leave your fleet's reliability to chance. If you are looking for a precision-engineered 31-tooth, 24-spline gear (like the 8877116) or other exact-match specifications, head over to HYGT-SPA. By sourcing premium components designed for your specific transmission model, you secure the exact matching parts required to get your truck back to peak operational performance.
No. Attempting to drive with a failing internal gear is highly dangerous. The compromised component can shatter under a heavy load, sending hardened steel fragments throughout the entire transmission case. This debris will instantly destroy bearings, synchronizers, and other critical internal assemblies, turning a localized repair into a complete transmission replacement.
Absolutely not. The mathematical gear ratios within the housing are fixed and inflexible. Attempting to install a component with an incorrect tooth count will cause the metal surfaces to bind immediately. This will lock up the auxiliary section the moment the clutch is released, causing instant catastrophic failure.
Inspect the metal ridges closely for "step wear" or a noticeable tapering effect on the edges. In a healthy component, these ridges should be flat-topped and uniform in thickness. If they appear sharp, twisted, or pointed, both the gear and the mating main shaft have suffered severe wear and require immediate replacement.
If the internal splines on the old gear are completely obliterated, you must measure and count the corresponding splines directly on the transmission main shaft. The count on the shaft will dictate the exact internal specification required for your replacement gear.
Yes. Installing a gear with an incorrect internal pitch or mismatched spline count creates micro-vibrations and uneven torque distribution. Over time, this loose fitment will aggressively chew into the main shaft splines, eventually requiring a highly expensive, full teardown to replace the entire shaft.
Always purchase from specialized, reputable heavy-duty drivetrain suppliers rather than general automotive stores. Dedicated suppliers have access to OEM cross-reference databases and can utilize your specific nomenclature tag to guarantee exact dimensional fitment and appropriate metallurgical quality for commercial applications.


